Jet-Ski Installations: Common Mounting Methods for WAIV AHOY
In this post, we’ll showcase some of the most common ways to install the WAIV AHOY GPS tracker on jet-skis. The ideal installation method depends on your specific needs and how you plan to use the device. For example:
Do you prefer a solar-powered setup that avoids wiring?
Would you like to connect to an external power source?
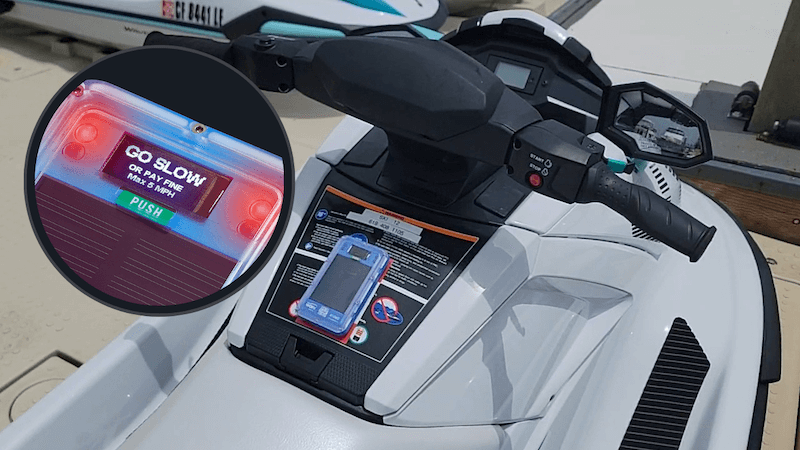
Do you want to use the built-in siren or LED display to give the driver real-time visual and audio alerts?
There are also multiple options for attaching the tracker to the ski, ranging from epoxy glue, velcro, or stainless steel zip ties.
Below are several proven installation methods used by operators in the field.
Mount By the Dashboard
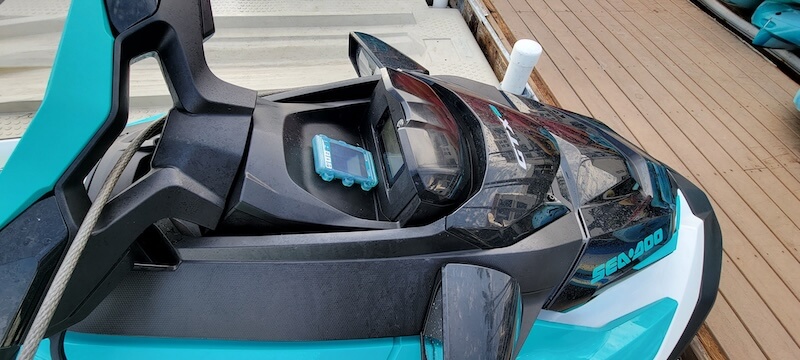
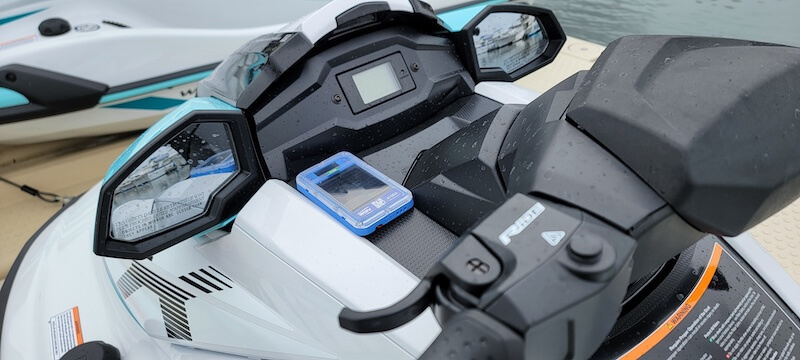
Mount on Glove Box Hatch
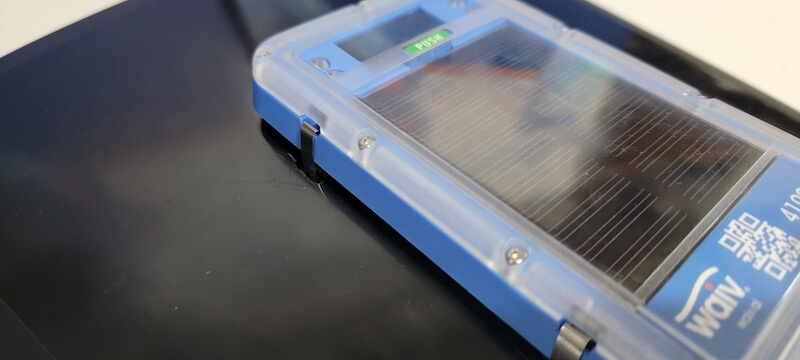
For the most interactive experience, we recommend placing the device on top of the glove compartment, making it easy for the driver to read alerts or messages displayed on the screen.
How to Attach
Glueing it Down
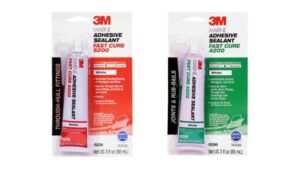
One of the simplest and most popular installation methods is using marine adhesive to mount the WAIV AHOY directly onto the jet-ski.
We recommend using:
3M Marine Sealant 4200 Fast Cure (strong hold, easier to remove later)
3M Marine Sealant 5200 Fast Cure (maximum bonding strength)
Both are available in black or white, and the “Fast Cure” versions let you get back on the water more quickly. Be sure to allow enough curing time before exposing the area to water or using the ski
Attach with Zip-Ties
The WAIV AHOY is designed with integrated zip-tie slots, making it easy to attach with marine-grade zip-ties. We recommend 316 stainless steel zip-ties for the best long-term durability.
Here’s an example installation on a Yamaha Waverunner’s glove box lid:
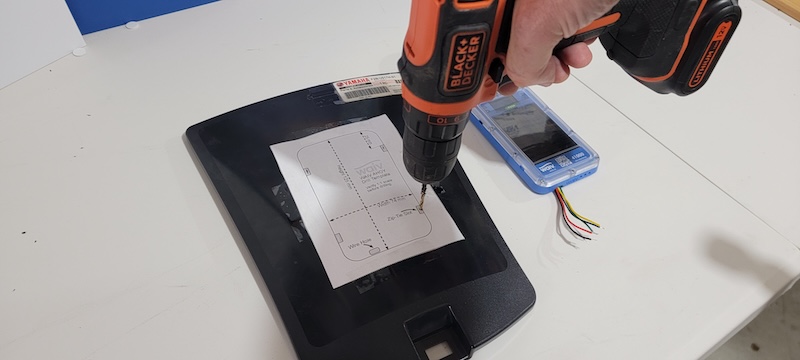
Step 1
Drill four zip-tie slots using our downloadable template to ensure proper alignment
Optional: Drill a 5th holes to feed wires for connecting external power or siren
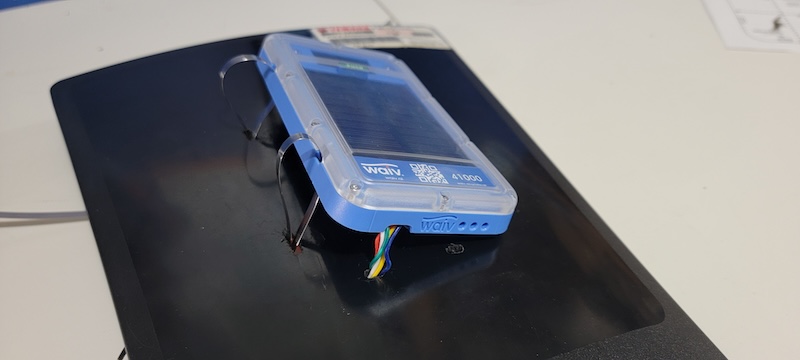
Step 2
Feed the zip-ties through the device slots and the drilled holes. Use pliers to add creases in the zip-ties for a tighter fit.
Optional: Feed the wires through the wire hole. Since the device is solar powered, you can omit this step for a simplified installation.
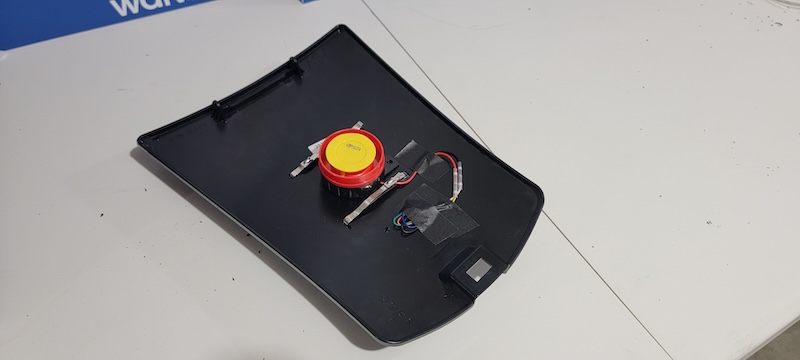
Step 3 (Optional - Add External Siren)
For a stronger siren effect, mount our 125 dB external siren inside the glove box lid. This transforms the glove box into an acoustic chamber for enhanced sound projection.
Finally, once the device is installed on the glove box lid, consider using additional zip-ties to secure the lid to the jet-ski itself for added protection..
Wired Installation Options
For a wired setup, the WAIV AHOY can be installed almost anywhere inside the jet-ski. Many glove boxes already include 12V or USB power outlets, making it easy to connect to an existing power source.
Some models, like the 2025 Yamaha VX, feature an under-seat compartment that is rarely accessed by renters — a perfect location for discreet installation. Conveniently, the main battery is typically located just below this compartment, allowing you to run a power wire with minimal effort.
Temporary/Trial Installation Options
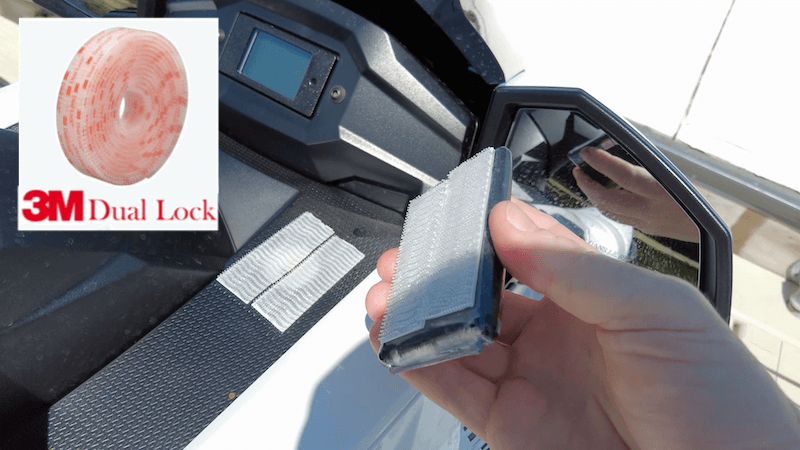
Heavy Duty Velcro
If you’re just trying out WAIV AHOY using our fully refundable trial, a temporary install may be sufficient. Some operators use 3M Waterproof Dual-Lock or heavy-duty marine Velcro.
While this approach works well for short-term use, we don’t recommend it for permanent installations.
.
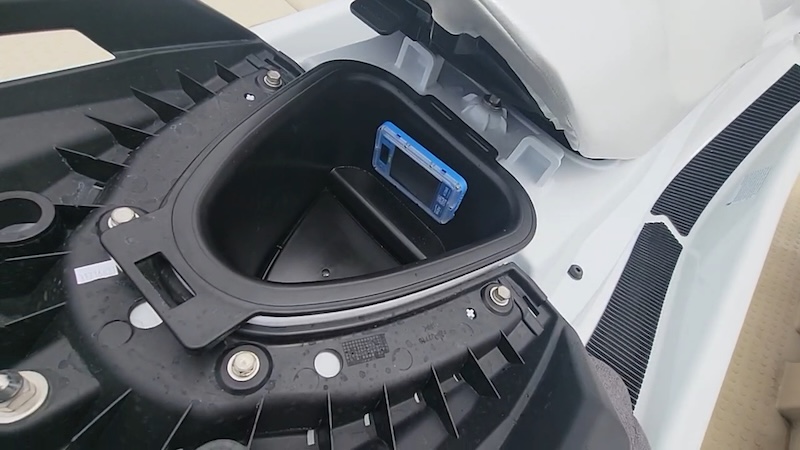
Phone Storage Pocket Inside Glove Compartment
Many modern jet-skis comes with a special storage pocket for phones and wallets located in the glove compartment. A perfect fit for the WAIV AHOY during a temporary trial run.
.
WAIV Technologies, Inc.
4438 Ingraham St
San Diego, CA 92109
Phone: 858.935.4485
Email: contact@waiv.ai
Website: https://waiv.ai
